How to configure a Load Balanced Mysql Cluster with pfSense
In this post I show how to configure a Mysql Cluster with a load balancer pfSense, the open-source firewall based on the FreeBSD distro. At first I install the Mysql Clusterinstance (multi-master configuration), then the pfSense TCP load balancer.
MySQL Cluster consists of three different components:
1. Management Node (mgm): for the configuration and monitoring of the cluster
2. Data Node (dn): the data store
3. SQL Node (mysqld): the mysqld daemon that connects to all of the data nodes in order to perform data storage and retrieval
In this guide, I use the same server for the mgm and mysqld components and a second server for the data node. All Mysql servers will be replicated for a minimal High Availability configuration. For the pfSense instance I use a single server (you can configure an optional second server for failover). I create the Balanced Mysql Cluster infrastructure using the Virtualbox hypervisor with a total of 5 virtual machines, see the following image.
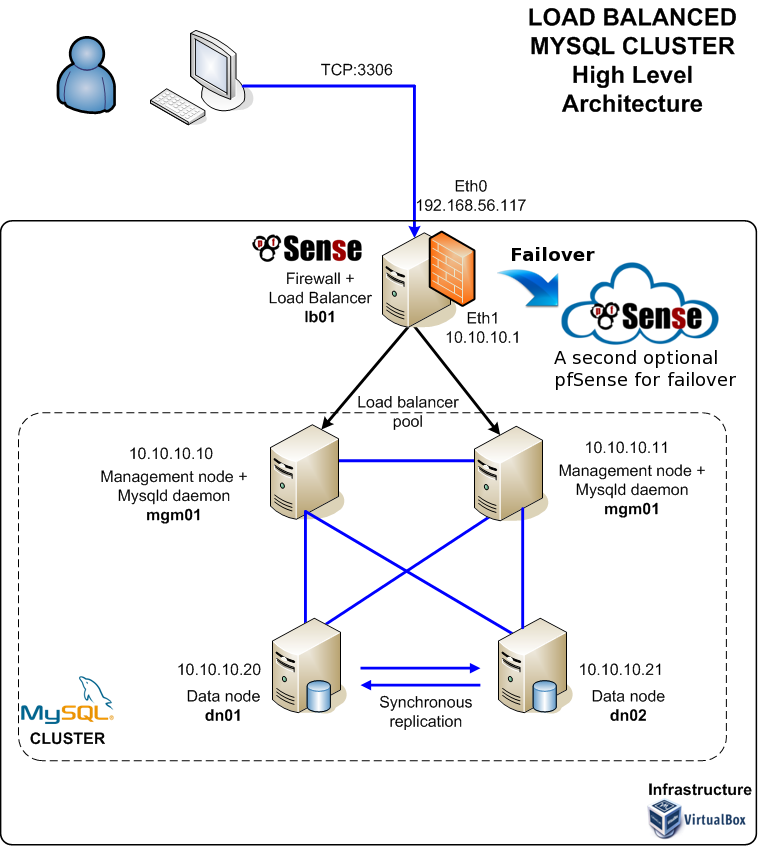
VIRTUAL MACHINES
IP 10.10.10.1 – lb01 (load balancer pfSense)
IP 10.10.10.10 – mgm01 (mgm+mysqld)
IP 10.10.10.11 – mgm02 (mgm+mysqld)
IP 10.10.10.20 – dn01 (data node)
IP 10.10.10.21 – dn02 (data node)
IP 10.10.10.10 – mgm01 (mgm+mysqld)
IP 10.10.10.11 – mgm02 (mgm+mysqld)
IP 10.10.10.20 – dn01 (data node)
IP 10.10.10.21 – dn02 (data node)
APPLICATION STACK
– SO Linux CentOS 6.5 64bit Minimal
– VirtualBox 4.2.16
– Mysql Cluster Server gpl 7.3.5
– pfSense 2.1.3
– VirtualBox 4.2.16
– Mysql Cluster Server gpl 7.3.5
– pfSense 2.1.3
ROADMAP
STEP 1. Preparing the environment
STEP 2. Setup Mysql Management nodes (mgm01, mgm02)
STEP 3. Setup Mysql Data nodes (dn01, dn02)
STEP 4. Setup Mysql Daemon nodes (mgm01, mgm02)
STEP 5. Setup pfSense Load Balancer
STEP 6. Test load balancer
STEP 2. Setup Mysql Management nodes (mgm01, mgm02)
STEP 3. Setup Mysql Data nodes (dn01, dn02)
STEP 4. Setup Mysql Daemon nodes (mgm01, mgm02)
STEP 5. Setup pfSense Load Balancer
STEP 6. Test load balancer
STEP 1. Preparing the environment
For the operative system I perform two kind of installation: a) setup and post-conf of CentOS for the Mysql Cluster b) setup and post-conf of pfSense for the Load Balancer I create the first virtual machines named mgm01 with a minimal CentOS installation. Before I proceed, let’s set some important post-configurations.
After the post-confs, I shutdown the mgm01 machine then I clone it. To create the Mysql Cluster architecture I need a total amount of 5 virtual machine: mgm01, mgm02, dn01, dn02. After cloning you must revisiting the network configurations. Here is a memo.
STEP 2. Setup Mysql Management nodes (mgm01, mgm02)
I continue with the Mysql Management Nodes in failover configuration. You must repeating these settings both on mgm01 and mgm02.
STEP 3. Setup Mysql Data nodes (dn01, dn02)
I continue with the Data Nodes. You must repeating these settings both on dn01 and dn02.
STEP 4. Setup Mysql Daemon nodes (mgm01, mgm02)
Finally I configure the mysqld daemon both on mgm01 and mgm02 machines. After the mysql startup, use the “mysql_secure_installation” command to complete the MySQL setup. If you want to have the synchronizing of grant privileges on every node, you must perform some SLQ commands. See below.
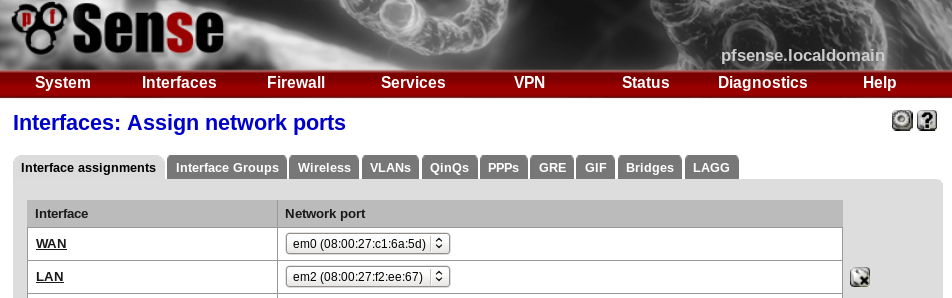
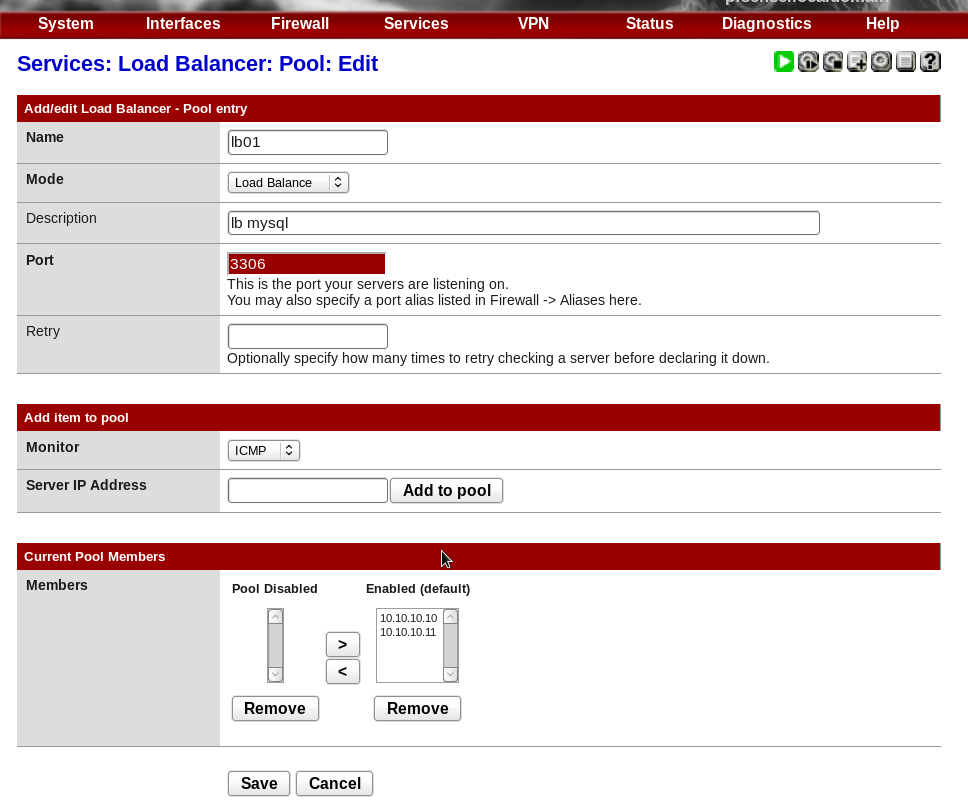
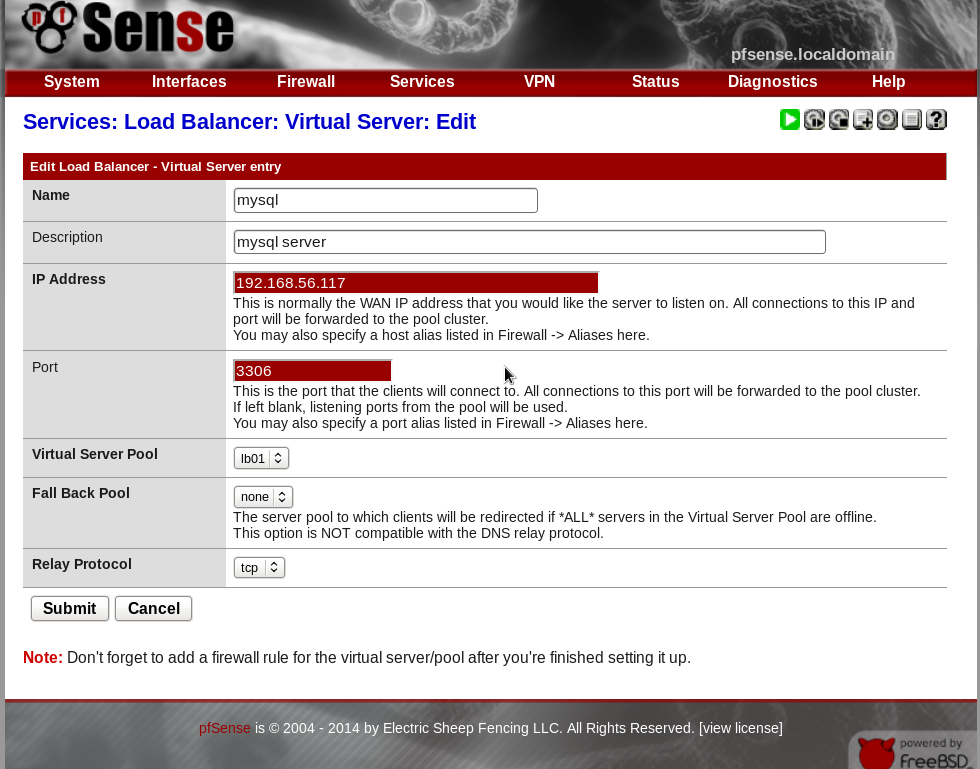
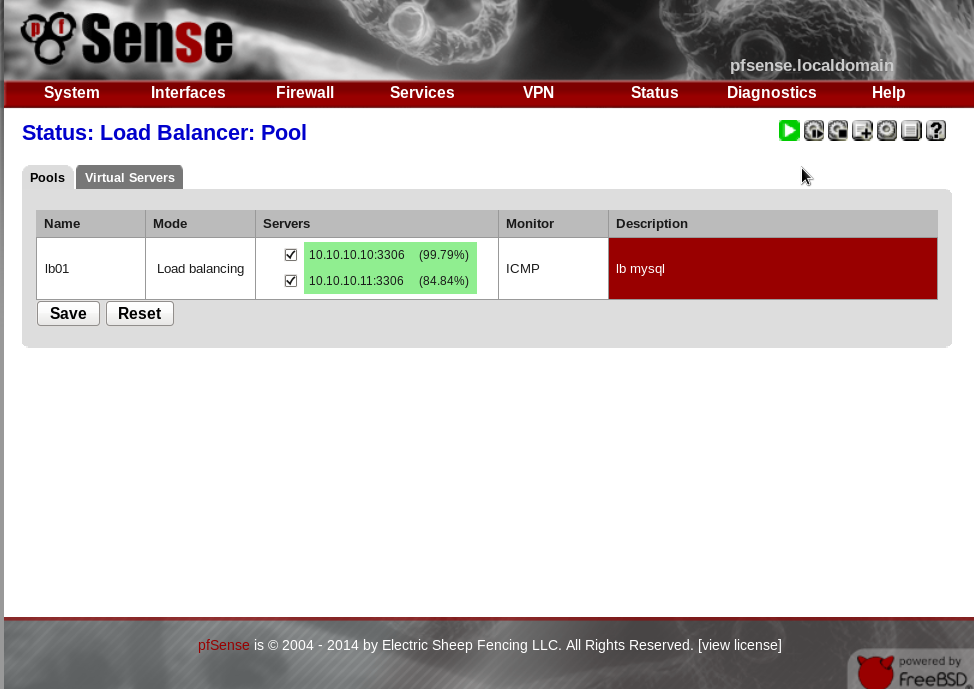
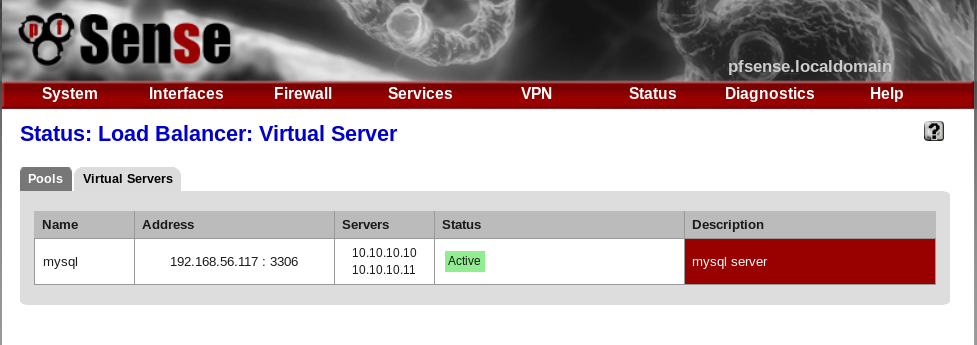
STEP 5. Setup pfSense Load Balancer
For the load balancer I create a pfSense new virtual machine with 2 network interfaces for WAN and LAN. The second NIC will be the defaut gateway for the mysql cluster network. Ensure that servers mgm01 and mgm02 have pfSense set as their gateway (10.10.10.1).

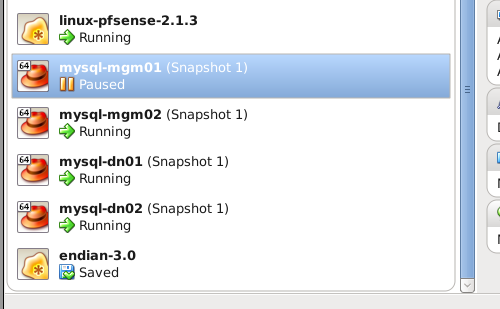
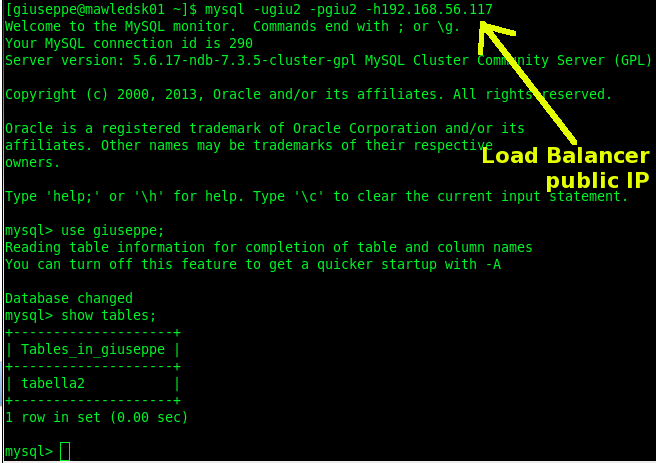
STEP 6. Test load Balancer
You can simulate a downtime event on the mgm01 or mgm02 machine. Open the Virtualbox control panel and put the mgm01 in “pause” mode. Now try to connect the mysql cluster using the pfSense WAN IP. If no errors occur, you can see the mysql client console shown below.


Nhận xét
Đăng nhận xét